
As mentioned at the end of last Friday's GWARt post Dum Dum was going to visit and show me the ropes of watercolour painting. There was only one other time in maybe 2008 or 2009 when I bought a cheap as hell Sumi INK Set with a brush that shed so bad I would hate using it and just gave up. I was more into painting Warhammer and WW2 army men at that time. So until 2022 I was dealing with acrylics.
We didn't have much time since we were going out to eat as well as watching 2 GWAR films back to back that day. Of course we Overplanned like idiots, watched only IT'S SLEAZY and to add insult to Injury, Dum forget her fucking Pizza Slice in our car, so I ate that shit with green pepper hot sauce from Cholula. That was my reward for her SCREAMING at about 1,000 Decibels in my left ear for reasons I now forget. So we did our painting session, I drew one of the kids I used to see bouncing around the hallways in elementary school down the Special Hallway across from the Dean's Office.
This session felt almost like colouring digitally except for when I would have too much water and it would bleed into a spot I didn't want it to. I am using one of those Water In The Handle Brush Pen Brushes from Sakura (the Microns motherfuckers) and their Koi Watercolours Pocket Field Sketch Box. The first thing Dum says when I open the palette is "You can tell this is old because the bricks are cracked" fucking elitist JERK, but she was right it was like unused for 9 years in my room back in my Brooklyn Days.
I caught on quick, absolutely hated the drying times and had to soak up colours with a paper towel because I kept trying to go at the speed I am used to with Acrylics and Digital. It does not like that and bleeds. I am so used to colouring things from the Mid Tone and then shading, and finishing off with Highlights. This you have to go from High Tones down to Low Tones, layering and layering and blending and layering. A little awkward but fun nonetheless.

Dum Dum: I would like to preface, this IS NOT my character. This is fanart based off an old Matt Maguire comic. With that being said, let's get into it!
Put down the base coat. This is pretty self explanatory, put down all the paint on the inside of your lines. If you like to lay all the base colours first go ahead n do that! I personally like finishing one segment/re-occurring colour of shading before moving on

Beefus: I sketched super fast, did lineart with my Pilot Metropolitain Fountain Pen until she whipped out her PH Martins Ink and I had to break out my calligraphy pens instead, a good choice. I wasn't used to creating skin tones yet so I went straight for base colours on helmet and hair instead.

Dum Dum: So what happens next is slightly darkening the colour you just painted with a little bit of black (don't forget to test out the paint on a separate sheet of paper so you can adjust it to your liking). So you've done this, now you need to imagine where your light source is coming from. Where the light will fade away and darkness is starting to become prominitae is where you start to layer on. Its a little easier to understand what im saying by looking at the image below. Id imagined the light was coming from the top down so the darker areas would be near the feet, bottom of the belly, chin, and some of the upper head/forehead. REMEMBER this is your lightest bit of shading right now, so don't be afraid to let it really cling to everything!

Beefus: Once again played it safe and just buttered the teef, coloured the Drool, and Irises.

Dum Dum: Repeat this process now, but going a little deeper into the shading you had previously laid down. There's no need to add more black due to the properties of watercolour it will automatically make itself darker.

Beefus: Dum had a special tube of Burnt Sienna which she would mix with the tiniest bit of Red, I of course messed that up on my first try, but landed a decent skin tone on my second go round. I somehow shaded by accident on his left eye (his right eye). I added the pink on the gums first, then the eye corners, and finally picked purple for the inner mouth which of course pooled up without me noticing, and when I blew on it the colour spread, and after sopping it up the damage was done. At least the helmet and chinstrap shading looked fine.

Dum Dum: I had decided 3 layers of shading was enough for the body so i moved onto the blue armour parts. The same process as detailed in rule 2-3 is being applied here.

Beefus: I honestly should have left my shading at this, but of course I didn't. Added brown rot to his tooth cracks for the extra BAD BREFF. Another layer on the red although its barely noticeable. A little bit of the stupid inner mouth purple got on the side of the mouth, looks like a bruise. Maybe he has really bad depth perception and forked himself in the lips?

Dum Dum: Shading for blue armour parts and fuzzy skin is done!

Beefus: As I said on the previous version I really wish I left the fucking skin shading alone, its just too dark here, big mistake, looks kinda dirty but then again maybe that is a good thing? I did my final reds on the helmet, and I think I touched the chin strap again, which it didn't need. I notice I really need to think through if I need to shade more or not, there is no Undo Button, but hey you wont know unless you go too far so its ok. OR YOU COULDA TESTED ON ANOTHER FUCKING PIECE OF PAPER.

Dum Dum: Blood time! Blood can be a little tricky to mix but this is usually what i do. Human blood actually has a HEX code! #880808 is the most accurate colour of blood outside our body. So pull that up and try to mix accordingly. What is find is the absolute best is a LOT of red and some amount of black. When you layer on blood, its not transparent like usual watercolor so you want it to almost look solid by adding as much pigment as you can. Blood gets no shading with me, but you can totally do it!
For the blood in the fuzz, I used a sponge (if you cant afford fancy sponge, get a kitchen sponge you're willing to sacrifice) soaked in the same colour as the blood covering him and squeezed out most of it. Then with the little bit you have, dabbed the areas i wanted to have the dried matted bloody fur affect. Same was applied to the teeth and tongue, but with a streaking motion.
Splatter was done by sopping up some red with the brush, pulling back the bristles, and letting them go. If you dont mind your aera getting messy this is a really fun method to try!
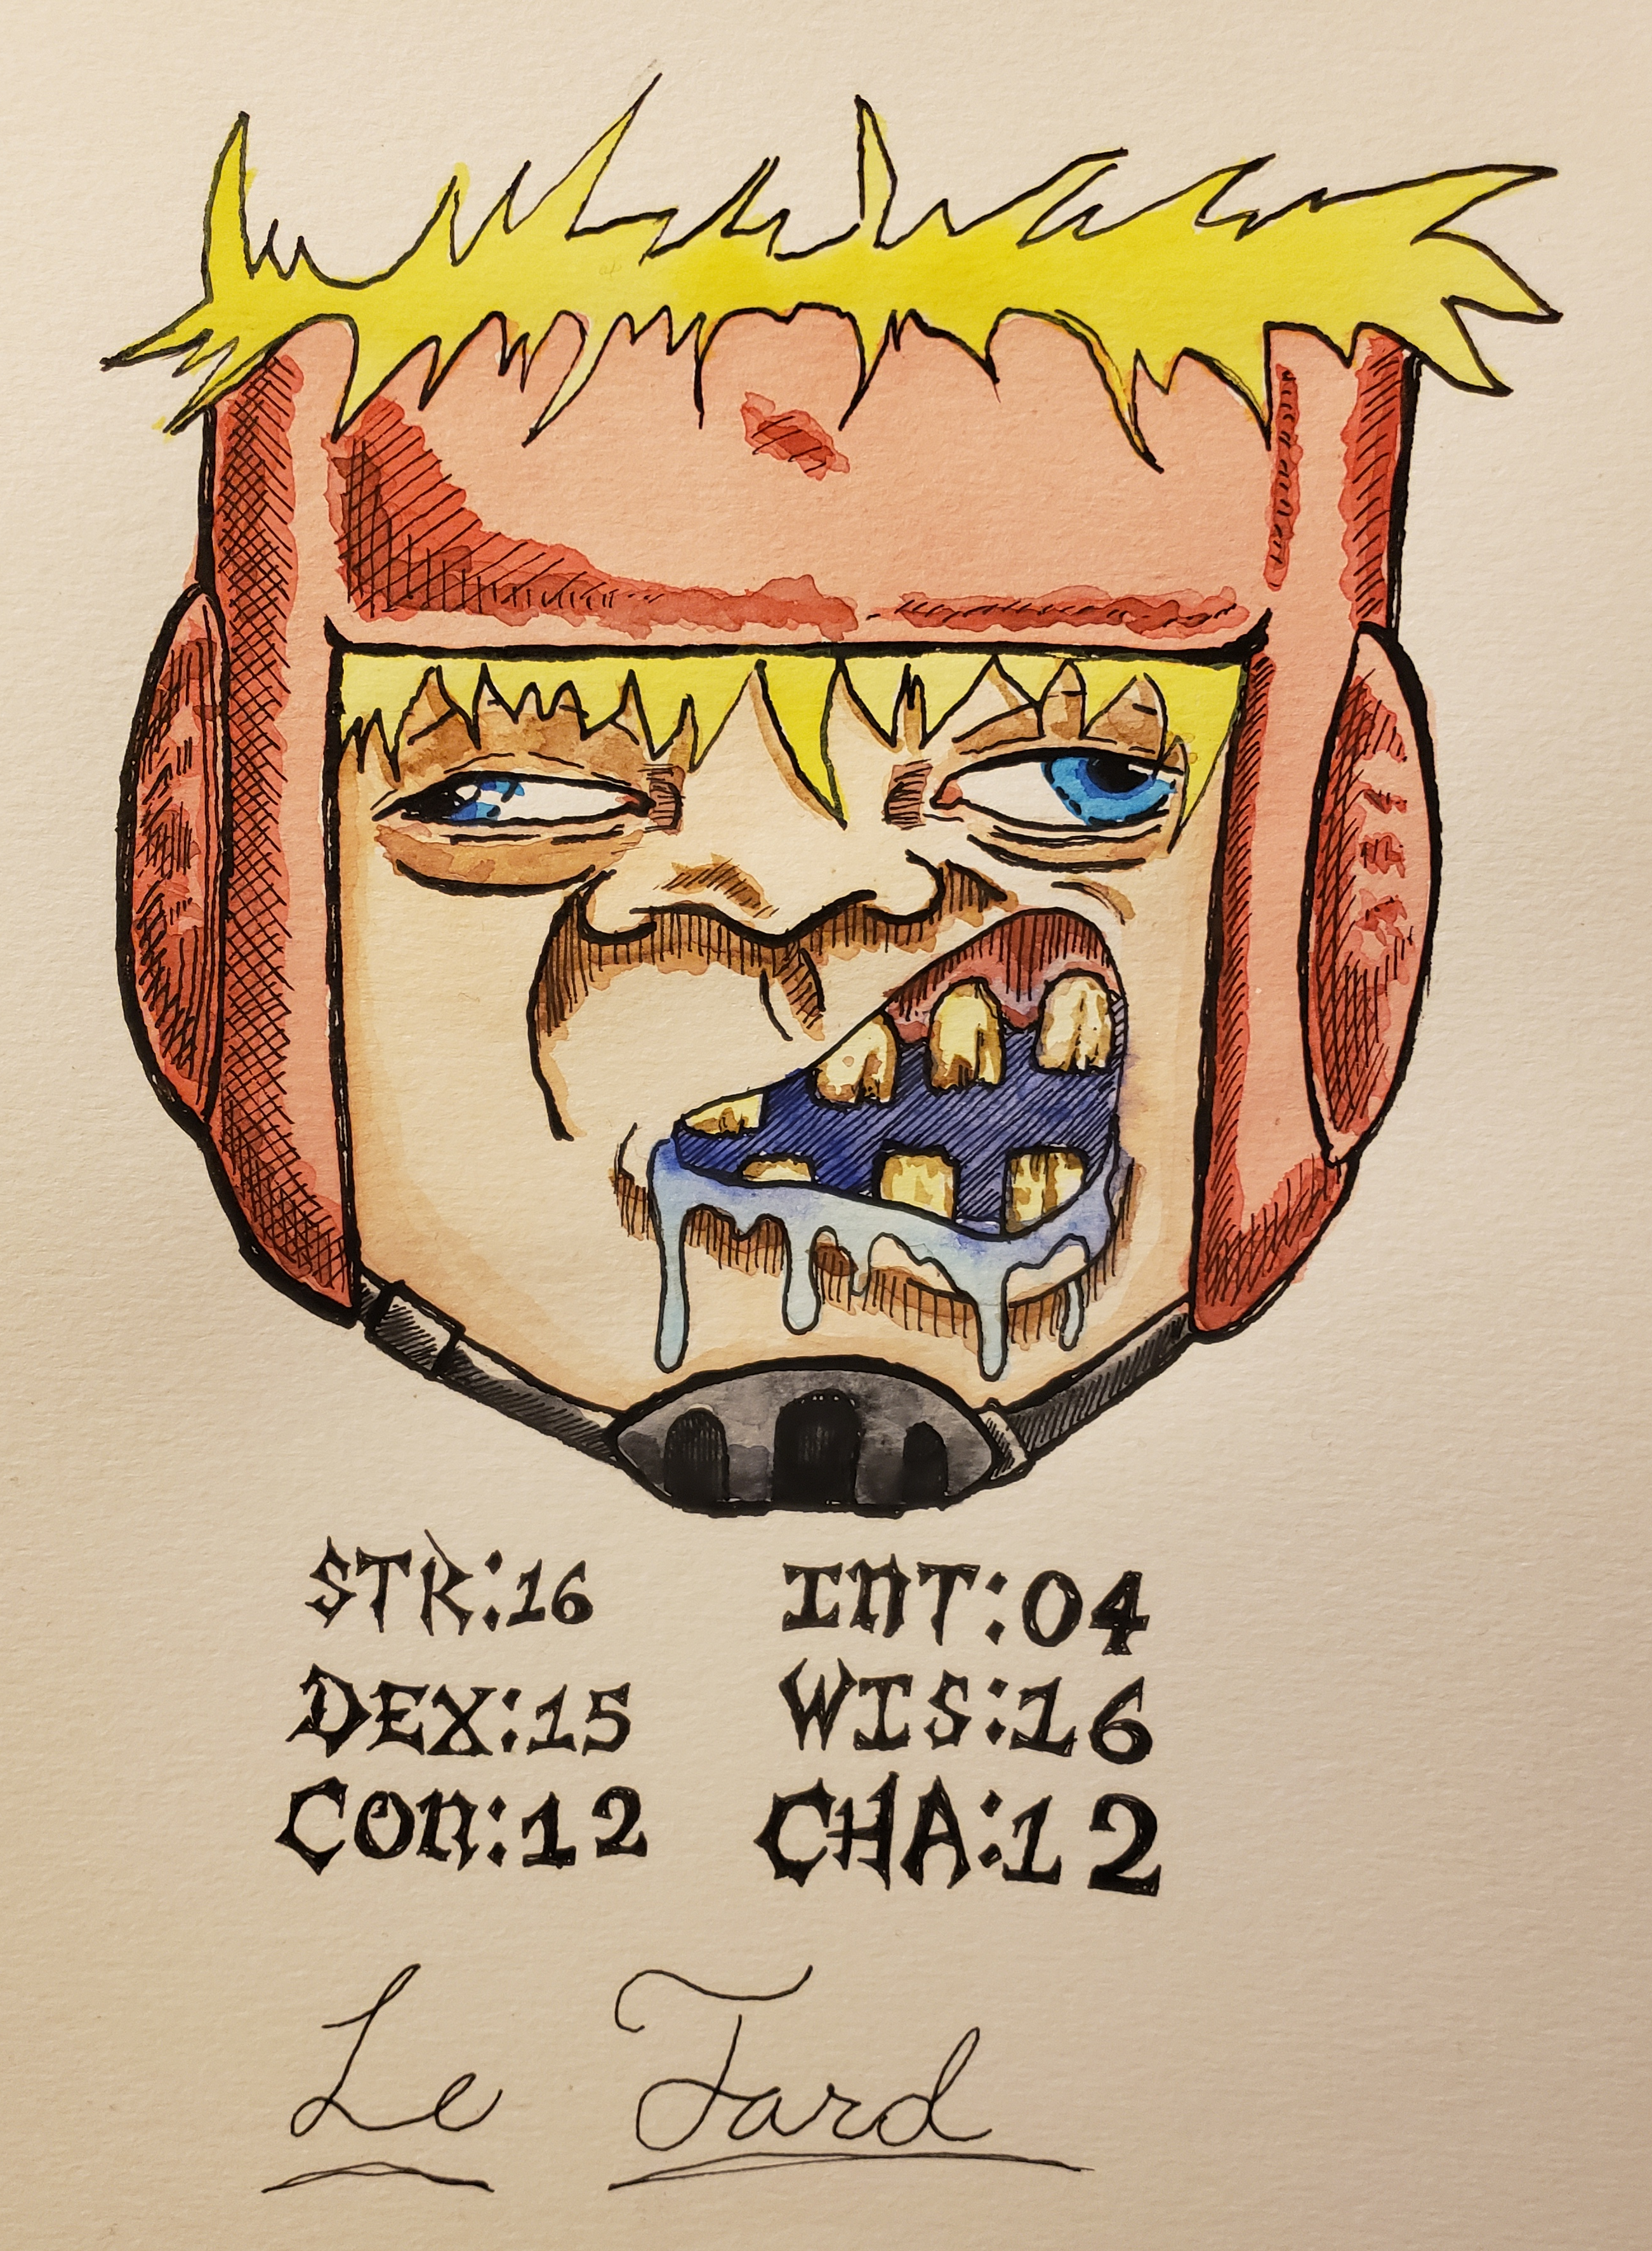
Beefus: As a finale we thought it would be funny to roll up his 6 Attributes, Dum had brought really tiny dice in a glass bottle so I rolled the D6 and he got some crazy ass stats! Le Tard was born.
Dum Dum:
Things to remember:
- You can only layer on top of watercolour, highlighting is basically nonexistent without mixing mediums. (which is totally fine!)
- This is my personal style that took awhile to develop, feel free to experiment and make something way better!
- The type of paper I like is Canson watercolour paper. It is thick as hell and perfect for this style since it breaks down at a lower rate unlike mixed media paper.
- The kind of watercolours I recommend getting are Winsor And Newton value packs, especially if you are first starting out. They have a decent amount of pigment and are pretty cheap.
- There are certain types of brushes for watercolour, but I really don't have a problem with just using general brushes.
CONGRATS!!!! You finished your little boy! Pat yourself on the back and rejoice in pride! If you followed along with this tutorial, feel free to Dm me your finished product! I hope this was at least a little bit helpful in assisting you in your painting endeavors!
Beefus: In Conclusion, it was fun to actually hang out with a person and do some art together. Maddy was there too just sketchin' in her sketchbook since she really dislikes to paint.
Have you read the other episodes yet?
Yes? No?
Click The Links Below!
No comments:
Post a Comment